
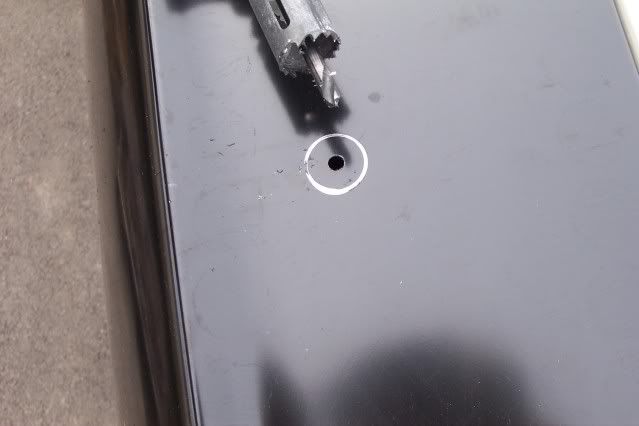
A hole saw will make the same ridge around the hole. When I drilled the hole for my radio antenna on the front fender using a hole saw, it made a ridge just like that.
[Blocked Image: http://i247.photobucket.com/albums/gg122/CSXEng/Antena007.jpg]
A hole saw will make the same ridge around the hole. When I drilled the hole for my radio antenna on the front fender using a hole saw, it made a ridge just like that.
[Blocked Image: http://i247.photobucket.com/albums/gg122/CSXEng/Antena007.jpg]
<BLOCKQUOTE id=quote><font size=1 face="Verdana" id=quote>quote:<hr height=1 noshade id=quote>
hmmmmm....
no answer to my hole Q
have another Q
how does one remove and install the drip rail chrome piece?
thanks
iowa
<hr height=1 noshade id=quote></BLOCKQUOTE id=quote></font id=quote><font face="Verdana" size=2 id=quote>
I used a can opener. More like an old bottle cap opener. The clip that would grip the bottle cap is used to pull the trim upward. You more or less role the trim off the steel. I put a piece of fabric between the opener and the chrome trim. I started from the rear by the quarter panel and work up to the roof then stop at the curve. Then I would start from the front and work my way to the rear curve where you stoped and it will pop off. Putting it back on takes care but you can do it. This time you role it back on. Hope this helps.
Dave V.
Also has 1966 gauges. brake line cut and moved to the single exhaust location. date is two days after mine.
Dave V.
Is there anyone who can tell me how the right side rear bumper guard Bracket is attached to the rear cross member? I've converted my "GT" rear valance panel back to it's original non "GT" type. The rear cross member was replaced with a NOS one, and of course there were no holes to place the bracket. I know I'll have to drill them. I know that the left side uses the "U" nut type hardware and bolt and is attached from the trunk side. So I'd like to know what the correct hardware is used to attach the right side bracket. Pictures would be great but I'm sure I can understand someones expertise in this matter. Thanks guys and Merry Christmas to all.
Dave V.
Edited by - CSXEng on 12/26/2009 00:19:24
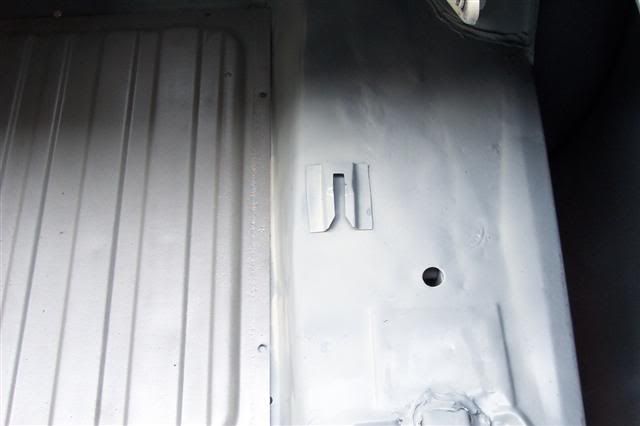
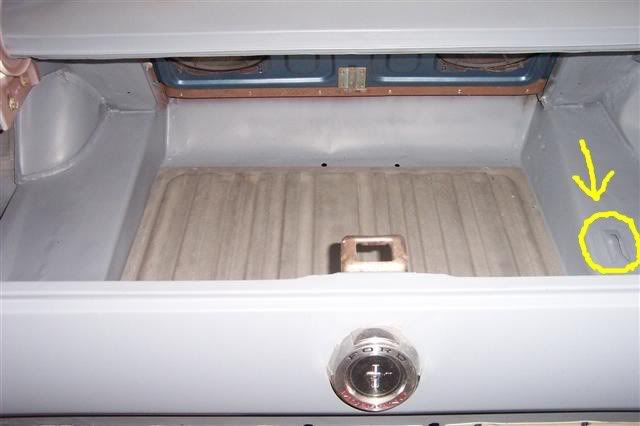
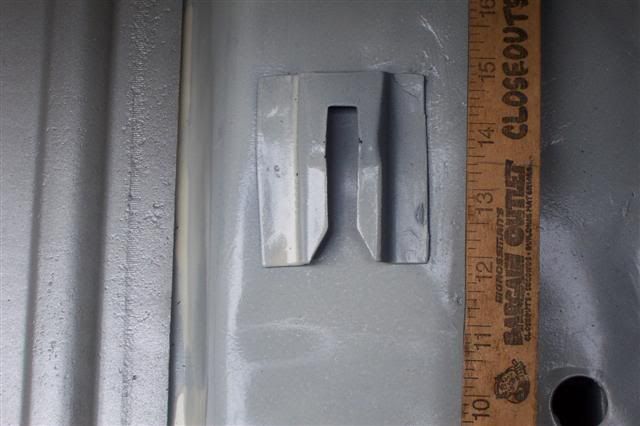
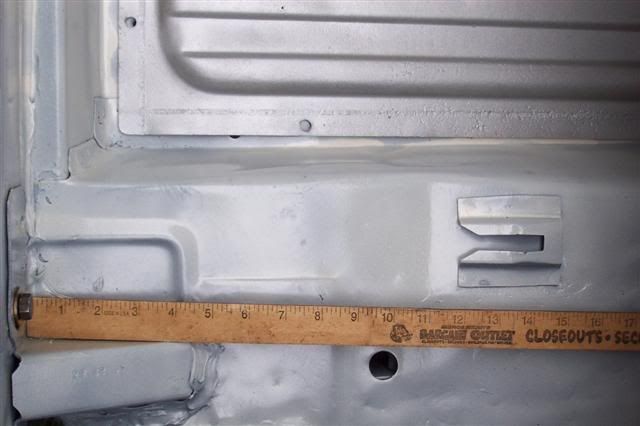
Here is a picture of my trunk panel with the spare tire hold down.
Make sure you weld it in the right spot cause the tire won't fit properly.
Dave V.
[Blocked Image: http://i247.photobucket.com/albums/gg122/CSXEng/SPTireHD1Small.jpg]
[Blocked Image: http://i247.photobucket.com/albums/gg122/CSXEng/107trunkprimedmarkedsmall.jpg]
[Blocked Image: http://i247.photobucket.com/albums/gg122/CSXEng/SPTireHD2Small.jpg]
[Blocked Image: http://i247.photobucket.com/albums/gg122/CSXEng/SPTireHD3Small.jpg]
Edited by - CSXEng on 07/11/2009 16:48:49
I Have the drivers side. Here's my email address.
CSXEng@verizon.net Dave V.
Should Be black or natural, top is black.
Dave V.
No. Straight from the can and add thiner.
Dave V.
Jimmy,
I posted these pictures before last year. Hope they help out.
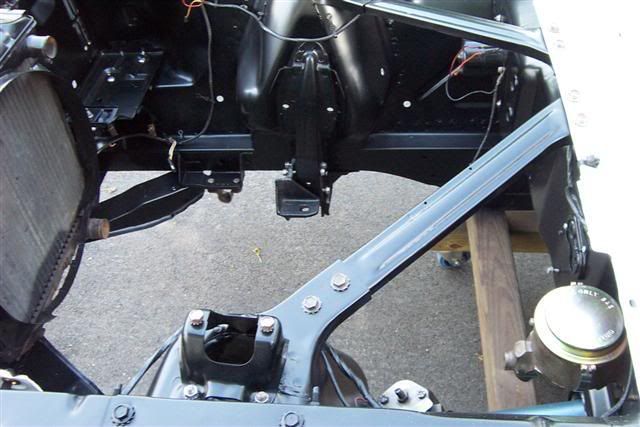
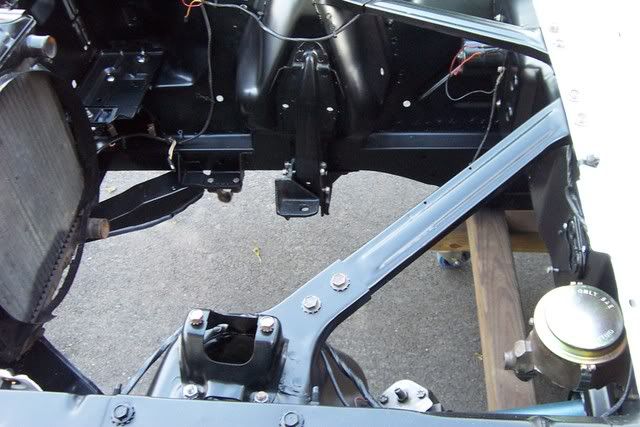
This is the color that Bob Perkins said was correct for the engine bay. PPG 9423.
Dave V.
[Blocked Image: http://i247.photobucket.com/albums/gg122/CSXEng/EngineBay002Small.jpg]
[Blocked Image: http://i247.photobucket.com/albums/gg122/CSXEng/EngineBay003Small.jpg]
[Blocked Image: http://i247.photobucket.com/albums/gg122/CSXEng/EngineBay004Small.jpg]
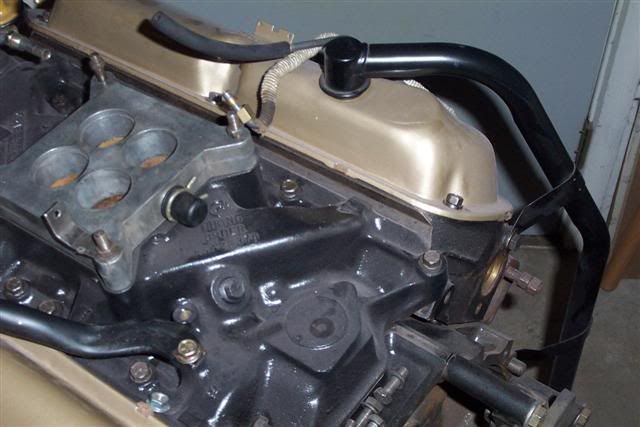
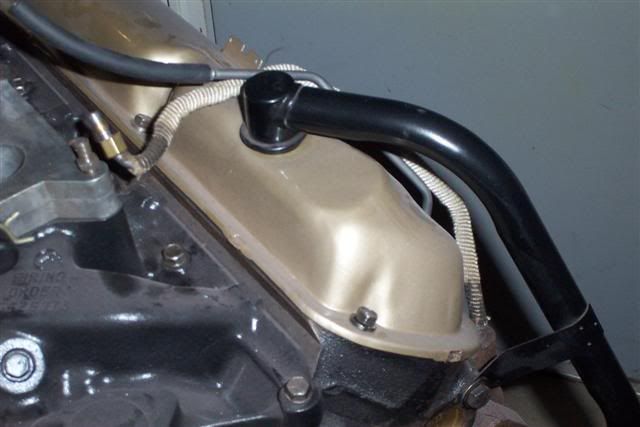
Here are two pictures of my draft tube on my 65 fastback 289 A code. Oct.13th is the schedule build date. Jacksonville DSO.
Dave V.
[Blocked Image: http://i247.photobucket.com/albums/gg122/CSXEng/Drafttube2s.jpg]
[Blocked Image: http://i247.photobucket.com/albums/gg122/CSXEng/Drafttubes.jpg]
"G" is the letter. Location in the lower right. I'm holding my original in my hand right now.
Dave V.
Thanks Jeff and all for the wonderful complements.
I have all the time but not the cash, now with a newborn. So this brings me to a stopping point or slow down. The baby that breaths through the nose and mouth gets the preference. The baby that breaths through the carburetor is second. Yes, I do have the heart to spray the sealer on the firewall openings. I always wondered why that was a messy area. Then Charles stated about that in a past post. Also that master cylinder cap is NOS but, I'm going the use my old one sense it should be all black. I'll have that for a spare. Why spray a perfectly good one. I keep in mind that our cars were for everyday use when new and restoring it the way it should be, would be no problem. Again, this site has been very helpful in all areas so I can thank everyone for their input.
Dave V.
Thanks Fred. I'm not sure if the bolts are painted or natural that hold the spring cover on. I'll have to strip the black off the engine mounts cause they are to be natural. This is the color that Bob Perkins said was correct for the engine bay. PPG 9423. Cleaning every bolt and nut by hand is a pain in the ass, but that's the fun part about this hobby. As Charles said, use as many original bolts, nuts and screws as possible Enjoy!
Dave V.
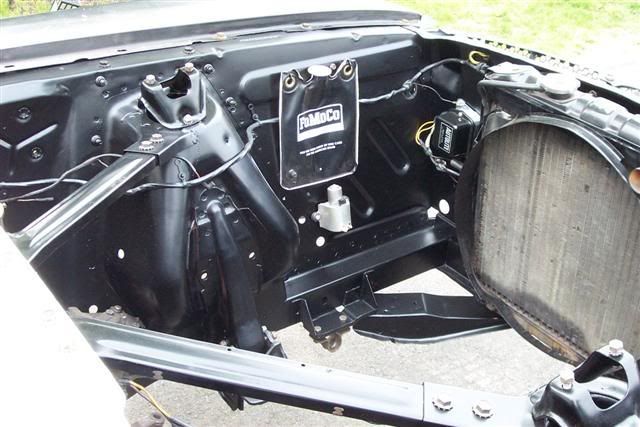
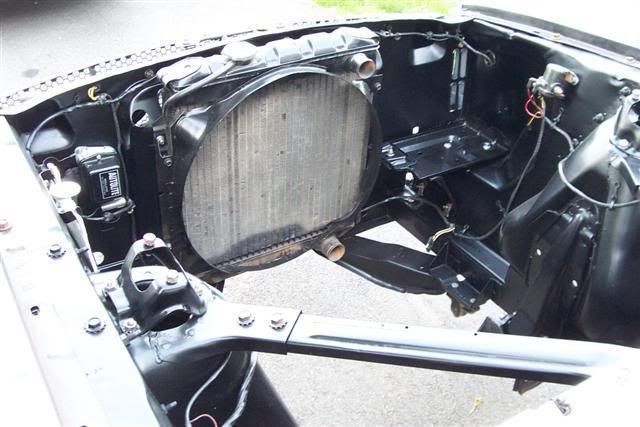
I thought I would show some work I did on my engine bay. No K-Code but all the same. Hope you all like.
Dave V.
[Blocked Image: http://i247.photobucket.com/albums/gg122/CSXEng/EngineBay003.jpg]
[Blocked Image: http://i247.photobucket.com/albums/gg122/CSXEng/EngineBay004.jpg]
RPM,
That is the same formula. I did not use PPG. Dupont Centari is what I used with the hardner. The paint store will cross numbers to make the formula. I use a hardner in the paint to with stand the heat from the engine. The hardner does give a nice shine. No clear coat was used. When I restored Gene's base I saved the original paint chip's to compare and it was a perfect match. Make sure you use a self etching primer on the bare metal parts. You can get that in a spray can. Little expensive but worth it. Pint size is enough to do air cleaner and valve covers for standard 289.
Dave V.
Rene,
There are no stupid questions to ask on the HiPo Mustang eKschange! There are alot of knowledgable people here and some are just starting out. If we had all the answers we would not have this great site! <img src=images/icon_smile_approve.gif border=0 align=middle>
Dave V.
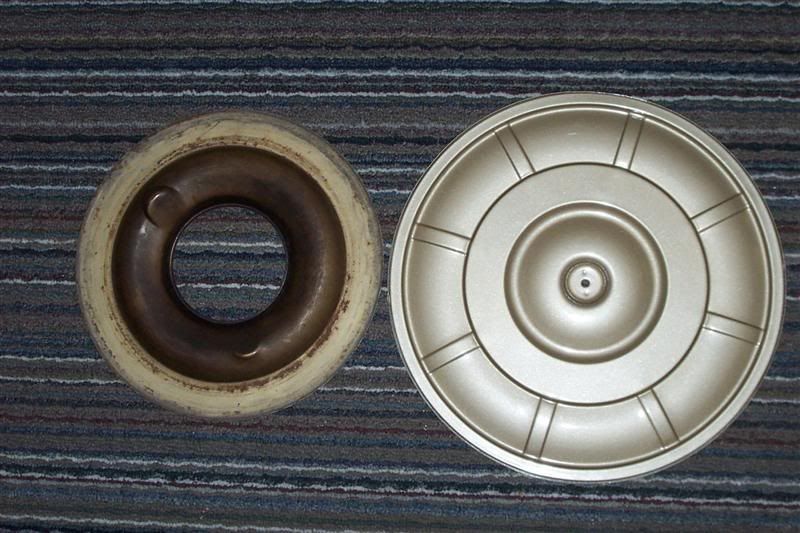
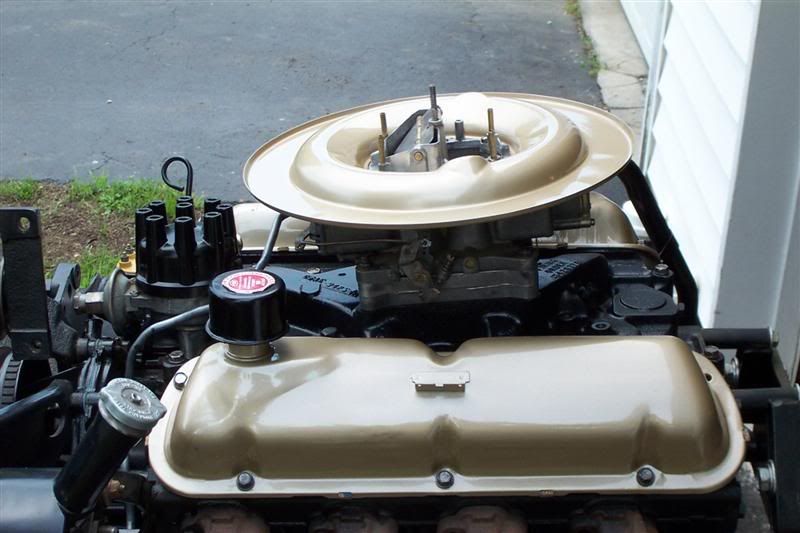
Here are pictures of Gene's original 1965 air cleaner base and my restored air cleaner top.
1)original painted base.
2)restored.
3)On my 289 for show.
I had fun restoring it for Gene. I saved the original paint chips for Gene to compare and it was perfect. Thanks to Charles Turner for the paint codes. Enjoy! Dave V.
[Blocked Image: http://i247.photobucket.com/albums/gg122/CSXEng/HiPoAirCleaner002Medium.jpg]
[Blocked Image: http://i247.photobucket.com/albums/gg122/CSXEng/HiPoAirCleaner018Medium.jpg]
[Blocked Image: http://i247.photobucket.com/albums/gg122/CSXEng/HiPoAirCleaner020Medium.jpg]
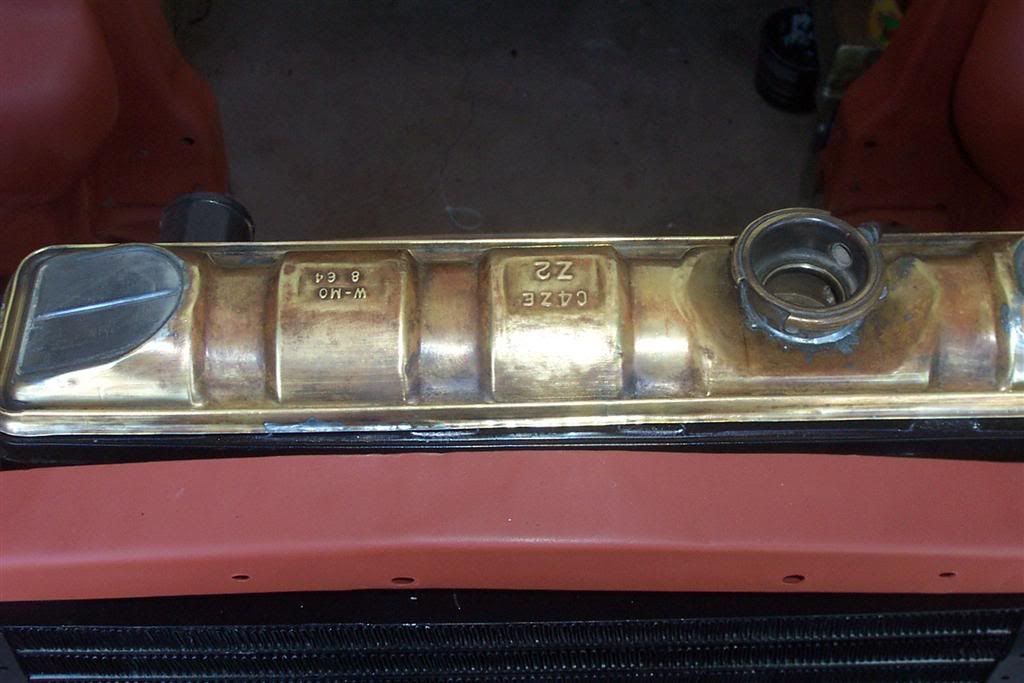
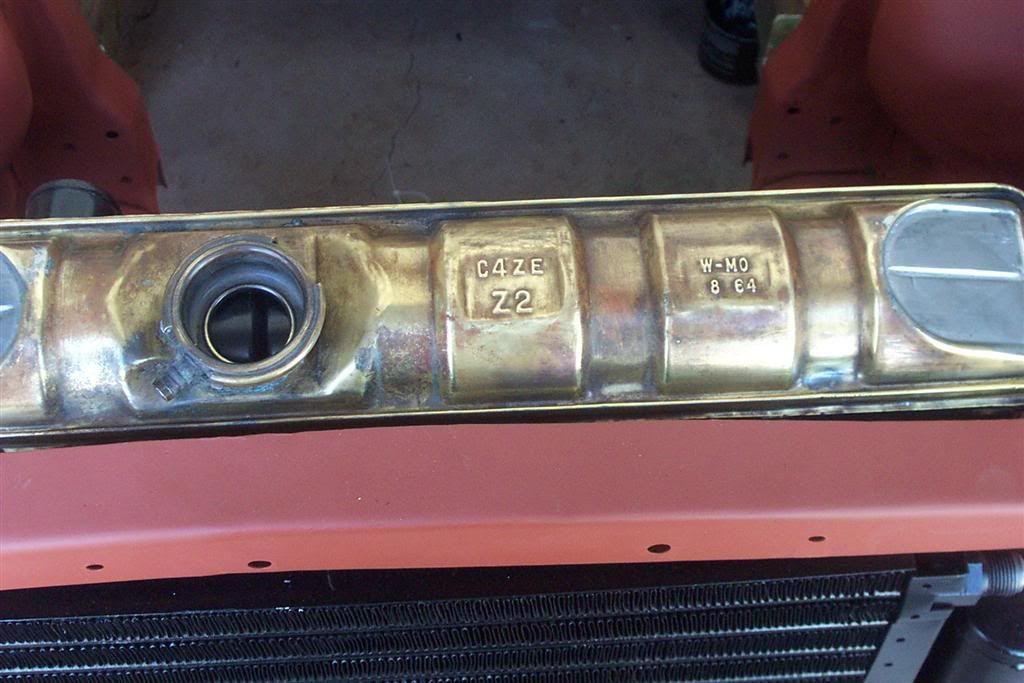
These are picture's of my Radiator tank top being restored.
I made the image's big so everyone can see the numbers and letters for reference.
The top was very dented. So I removed the top and fixed the dents.
[Blocked Image: http://i247.photobucket.com/albums/gg122/CSXEng/Radiator1a.jpg]
[Blocked Image: http://i247.photobucket.com/albums/gg122/CSXEng/Radiator2a.jpg]
Dave V.
Edited by - CSXEng on 04/06/2008 19:27:24
Edited by - CSXEng on 04/06/2008 19:42:26
Dave,
Is there any way you can send the video file of the demo to my email address. I'd like to burn a copy for myself so I can here it loud and in stereo on my TV! Thanks.
Dave V.
The Drive shaft will be shorter cause of the nine inch rear.(K code) Longer for the eight inch. (C or A code).
Dave V.